

Individual charcuterie boxes are a great option for entertaining, especially on the go! They also make wonderful little gifts for your favorite foodies!
Why Individual Charcuterie Boxes?
A great charcuterie board is a popular way to entertain guests, and individual charcuterie boxes are a unique way to enjoy a delicious spread with friends + family and so much fun. Creating your own individual charcuterie box is easy and allows for a customized and personal touch! Personalized DIY charcuterie boxes also make great gifts!
You can create these for all sorts of special occasions…
- Baby showers
- A date night
- The holiday season
- A bridal shower
- Valentine’s Day
- Birthday parties
- Mother’s Day
- Poolside parties
I’ll walk you through all the steps to create your own grazing boxes, from selecting a box and ingredients to composition and storage. So, let’s create something special!
Find Your Box
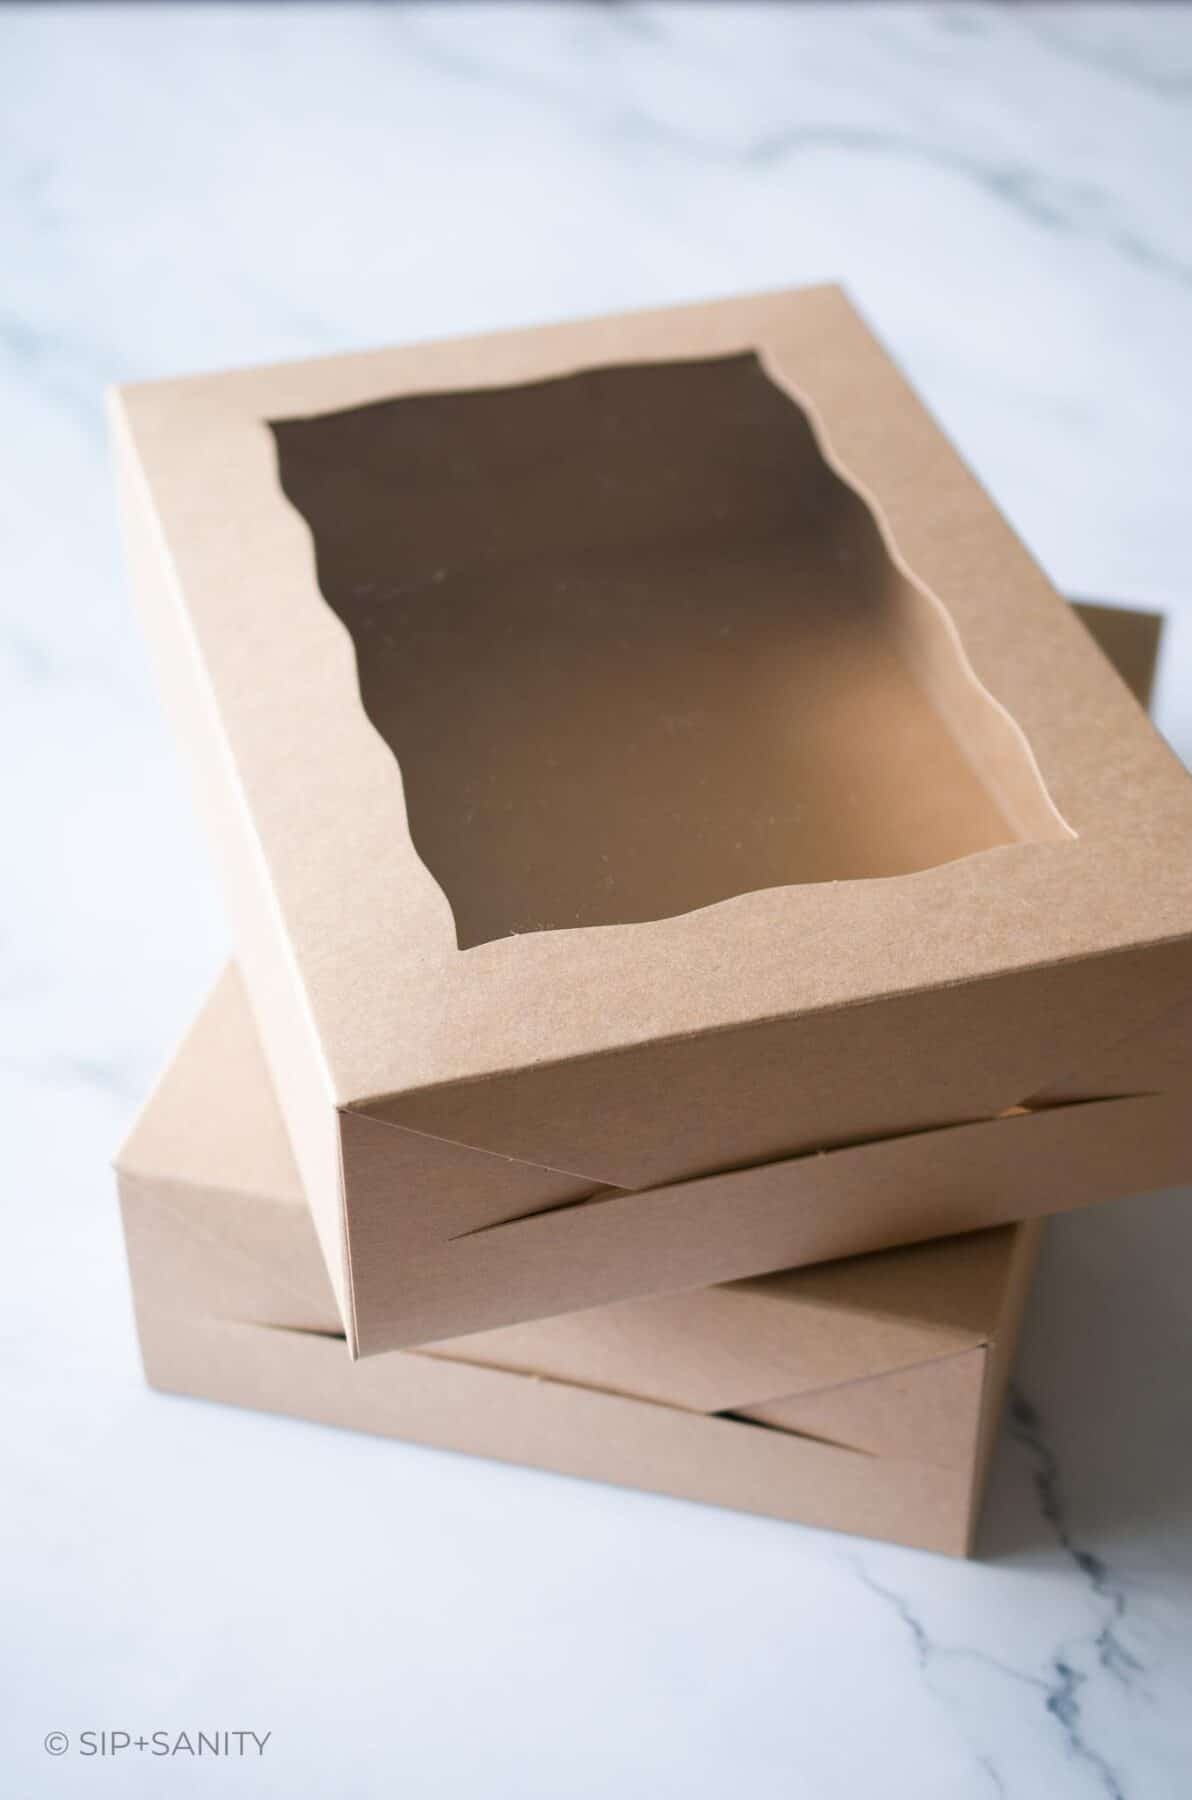
The first step in creating an individual charcuterie box is to find a suitable container. A lidded box is definitely a great way to contain and protect all the goodies, but there are many ways to present your creation.
Before selecting a container, ask yourself these questions:
- Do you want to serve a few nibbles or a light meal?
- What vibe are you going for?
- What is your budget?
- Do you need to pack and transport them?
There are many options available, including paper + wooden boxes, bento boxes, mini cutting boards, and bamboo or paper cups + cones. To transport or protect the ingredients, you can wrap open containers in clear treat bags or with plastic wrap.
Once you’ve selected a container, consider its size and shape and how it will fit your desired ingredients. Measure the dimensions of your container to determine how to cut and prepare ingredients so that everything will fit perfectly.
Decide on a Theme
Once you have your container, decide on a theme for your charcuterie box. You can go traditional and simple with delicious cheese, cured meats, and crackers, or you can get creative and choose a theme based on the occasion, holiday or the preferences of your guests.
Even with traditional boxes, there are lots of options, like selecting ingredients from a single origin like Italy or France or a region like the Mediterranean.
Other theme ideas…
- Brunch — include miniature versions of breakfast treats.
- Valentine’s Day — think shades of red, heart shapes, and chocolate.
- Spring garden — with fresh fruits, vegetables, and dips.
- Holidays — whether it’s the Fourth of July or St. Patrick’s Day, pick ingredients from a specific color family.
Whatever theme you choose, let it reflect your personal style and taste!
Gather Your Ingredients
Selecting the ingredients is the most important part of creating an individual charcuterie box. You’ll want to consider dietary restrictions, budget and size of the container when choosing what to include. Strive to create a diverse variety of flavors to keep things interesting!
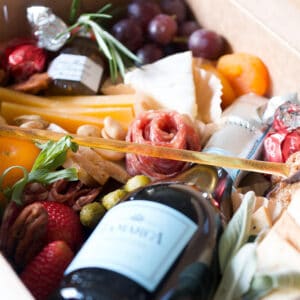
At the base of your mini charcuterie boxes are these four main elements: meat, cheese, crackers + bread and fruit + veg. Then, you can fill in with dips or spreads, nuts or seeds, and briny, salty, sweet, or savory elements. Finally, amp up the visual interest with pretty things like fresh herbs or edible flowers.
The Meat
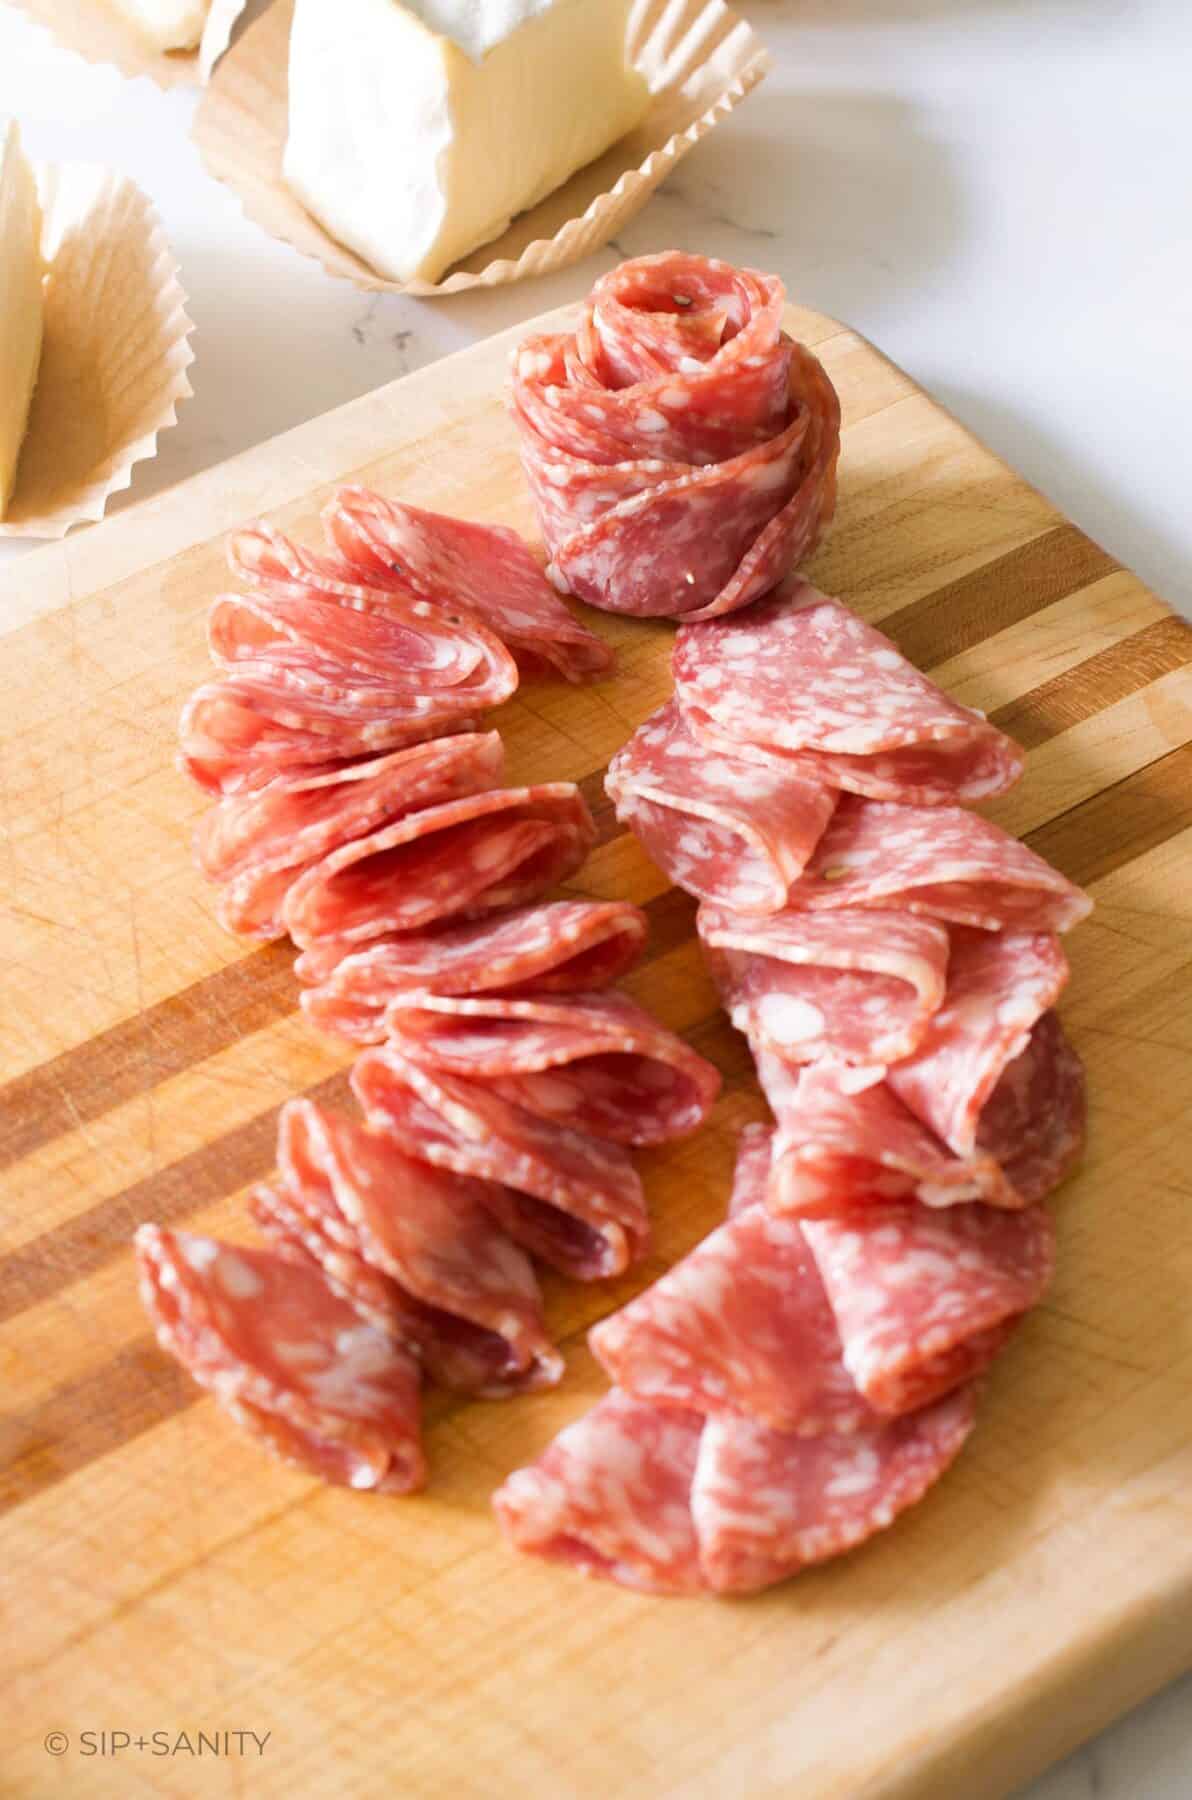
There are a variety of meats to choose from, such as Italian dry salami, prosciutto, soppressata, saucisson sec and Spanish chorizo. Choose just one or a couple.
There are also many ways to present these and you can choose one or a variety to fit the size and shape of your container: rolled, folded (in half or quarters), fanned out, as salami roses, piled up, or as a ‘river’ of meat.
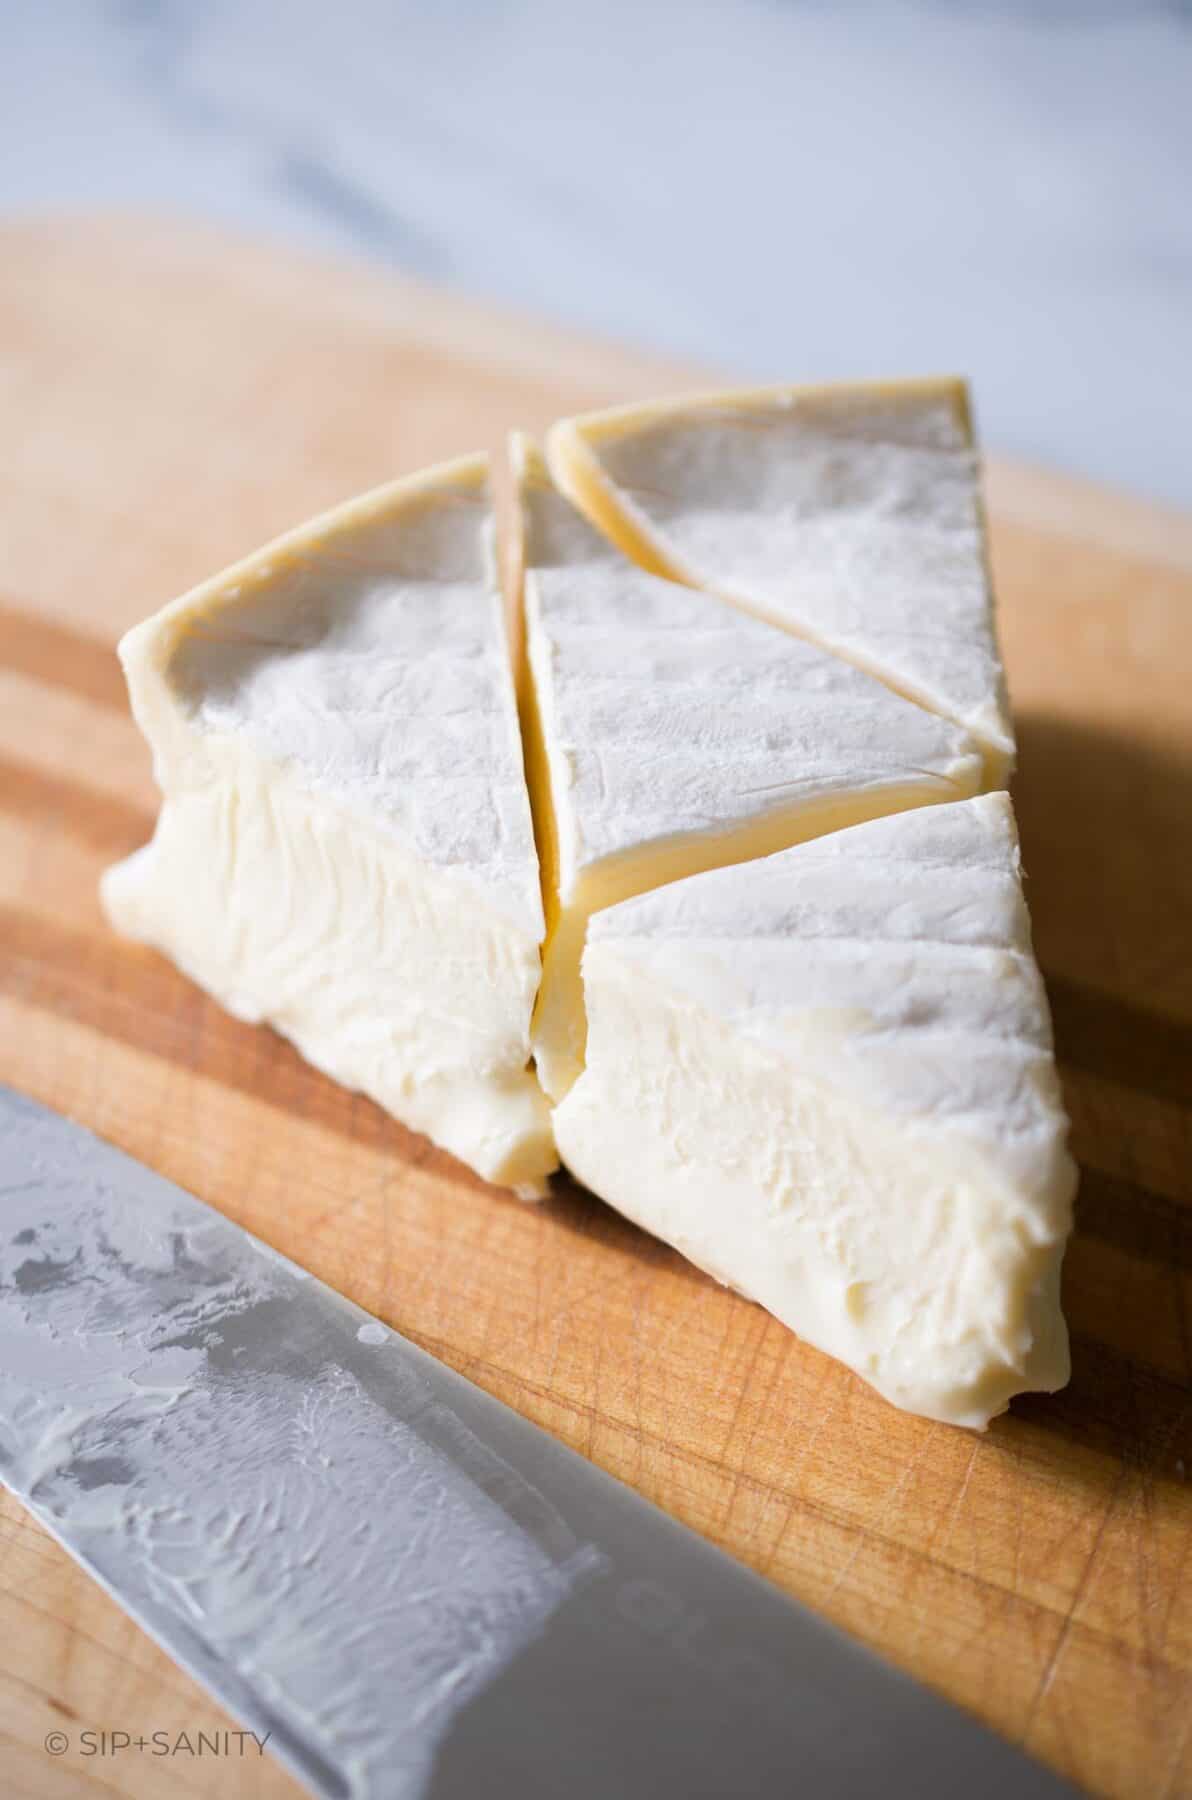
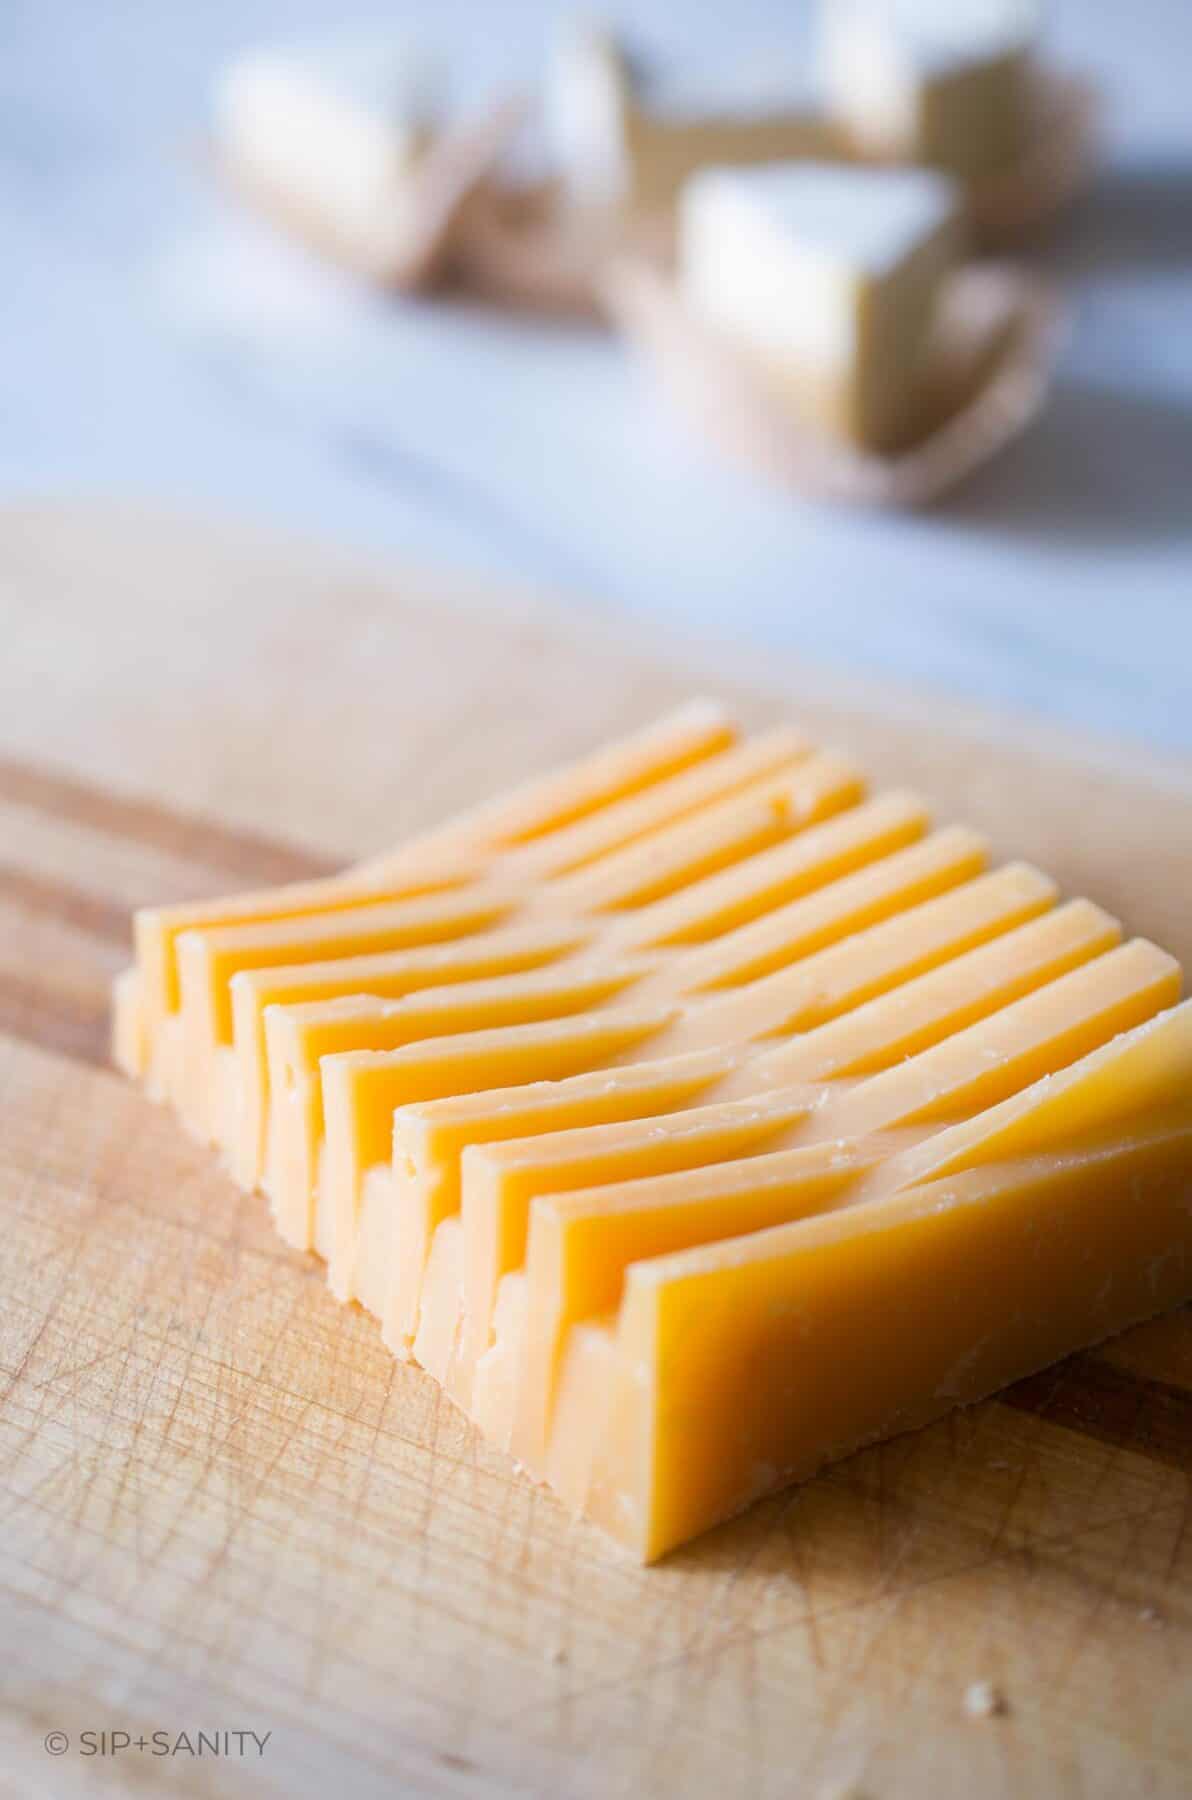
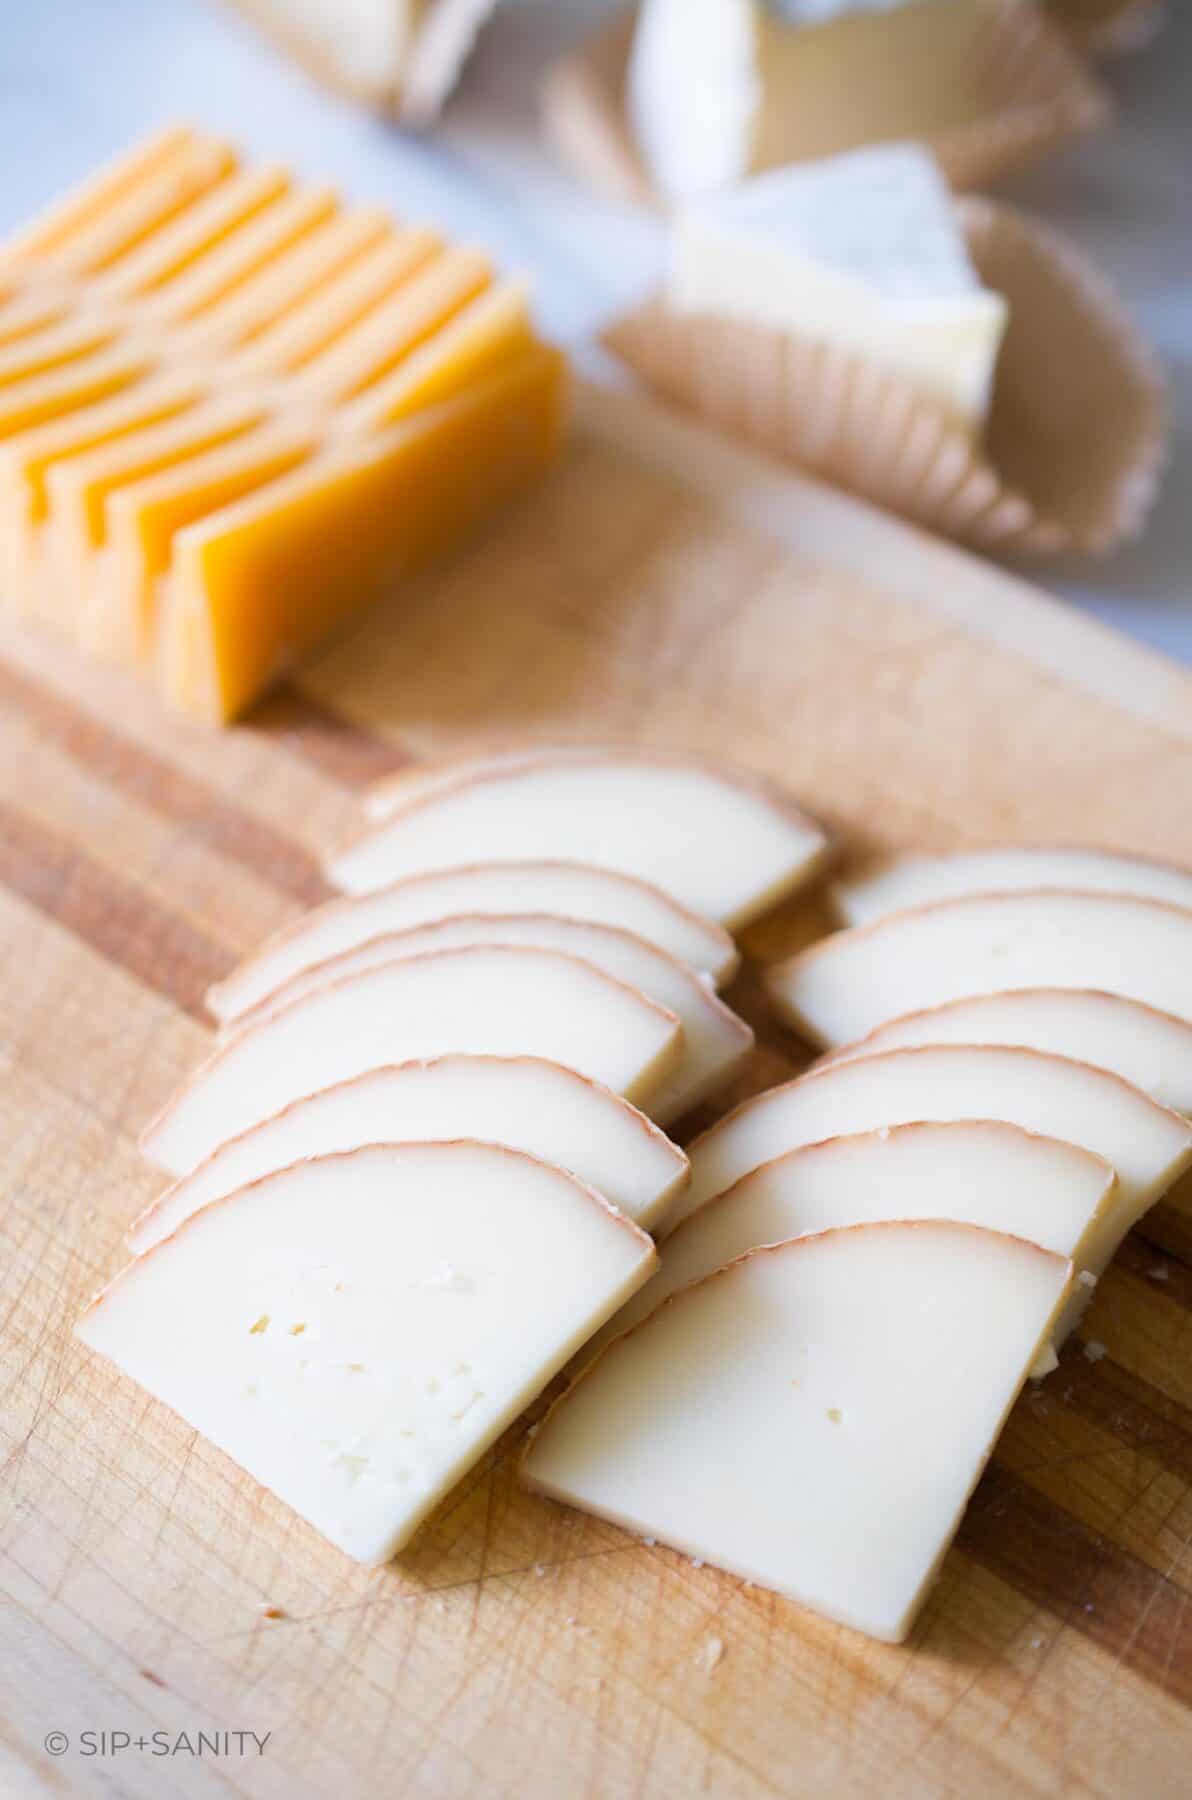
The Cheese
If including more than one cheese in your box, consider a variety of textures (soft vs hard cheese), flavors (nutty, pungent, herbal) and origins (type of milk, country). Keep in mind that a soft goat cheese might not do so well in a small cone shaped container. 😉
Some popular choices:
- Brie (or mini brie wheels, how fun!)
- Goat cheese
- Aged gouda
- Comte
- Manchego
- Cheddar (I’m partial to Irish varieties)
- Blue cheeses
- Bocconcini (mozzarella)
Each type of cheese lends itself to a certain type of cut. (Here’s a great starter guide for that.) You can arrange slices or wedges in different ways to create visual interest.
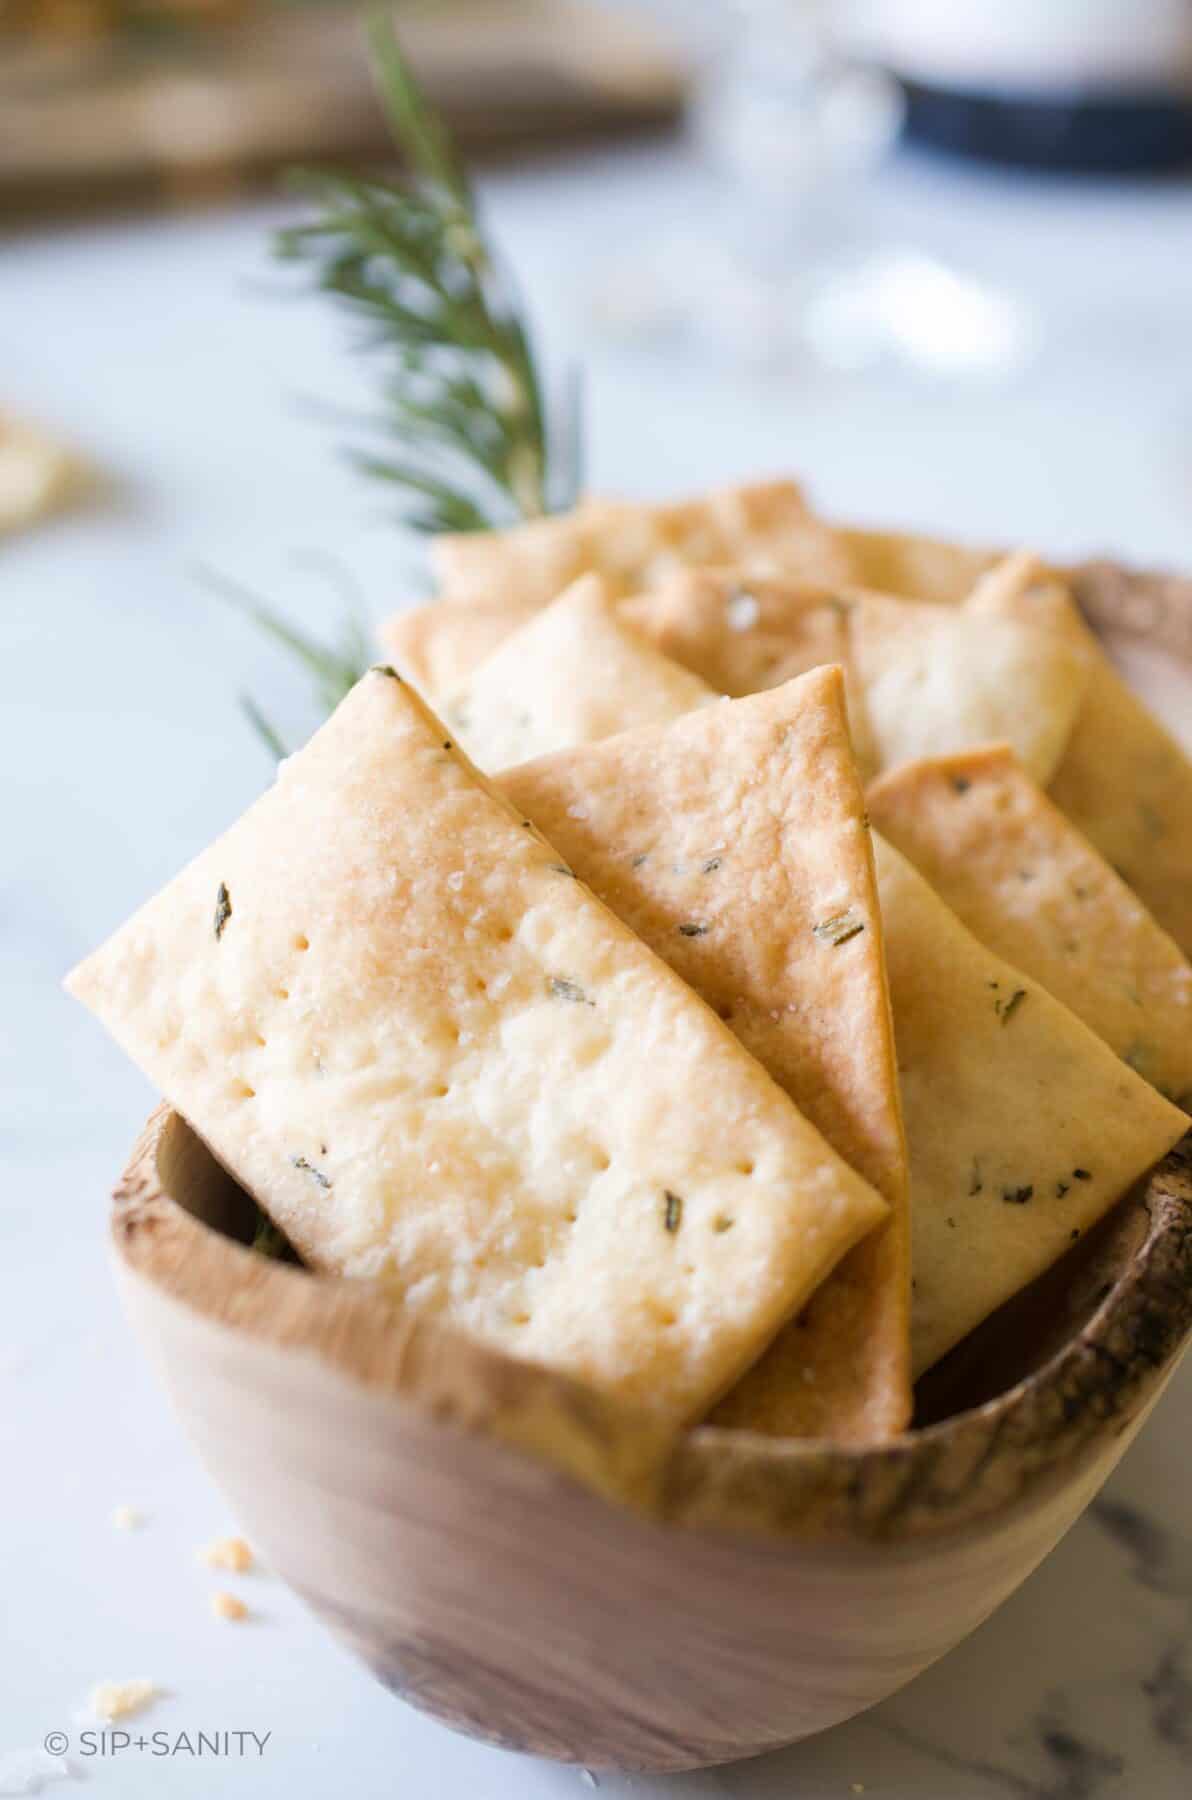
Crackers + Bread
Soft cheeses especially, need a vehicle to get from point A (the box) to point B (your mouth)! Provide some crostini or crackers to enjoy with spreadable cheese.
You can go with neutral options like plain crostini, water crackers, or simple seeded flatbread crackers. Or, choose from a variety of artisanal crackers studded with fruits and nuts, or herbs.
There’s also something special about including one homemade component in your individual grazing box and these easy Rosemary + Sea Salt Crackers are delicious!
Fresh Fruit + Veg
Popular fruit choices include fresh grapes, figs, and berries. These are always nice to cut through the richness of cheese.
Cut veggies like carrots, cucumbers, bell peppers or radishes into slices or batons. The crunch of a fresh vegetable provides a nice textural element.
The Supporting Cast
- Dips + spreads — some cheeses, as well as veggies, are enhanced with dips and spreads such as hummus, tapenade, mustard, jams, and honey.
- Nuts + seeds — salty and crunchy, these are just plain fun and a great way to introduce some additional flavors, like rosemary roasted Marcona almonds, sweet + savory mixed nuts, or a spicy pumpkin seed.
- Olives + pickles — green olives or black, stuffed with cheese or garlic, sweet or tart pickles… these are always a nice addition to a cheese board!
- Sweet things — dried fruit like apricots and cranberries are a go-to in these situations. But, also consider trail mix, chocolate candy, cookies, and mini baked goods.
- Savory things — sometimes crackers don’t do the trick, in which case, potato chips, pretzels, sesame sticks or other salty snacks may be the perfect stand in.
- Pretty things — to add a pop of color and contrast to your delicious charcuterie boxes. Tuck in sprigs of fresh herbs such as rosemary, thyme, sage or bay leaf (not the dried kind). Garnish with edible flowers like chamomile, pansies, marigold, and even roses.
- The Drink — obviously you’re going to wash all these yummy things down with a drink, but if your box is big enough, you can include a mini bottle of sparkling water or wine (because bubbly wine goes with all the cheeses!). This is a great option for picnics or gift giving.
Additional Supplies
When creating your individual charcuterie box, make sure to provide the right tools and supplies for guests to enjoy your handiwork.
Knives or spreaders are helpful for spreading soft cheeses, jams and dips. Forks or picks are great for olives and pickles. Jars and ramekins are helpful for corralling jams, honey and dips.
Place a sheet of parchment or wax paper in the bottom of the box to prevent messes. Use paper muffin liners to contain gooey cheeses like brie, or to protect cookies from commingling with pickles (unless you like that kind of thing).
Finally, if you plan to cover your boxes, cones or cups, be sure to have some treat bags or plastic wrap, and twine or ribbon to seal them up.
How To Assemble Your Individual Charcuterie Boxes
Individual charcuterie cups or cones require you to think vertically. They are also smaller and ideal as an appetizer course. Wooden skewers can be used to help build your ingredients up and create a lovely presentation.
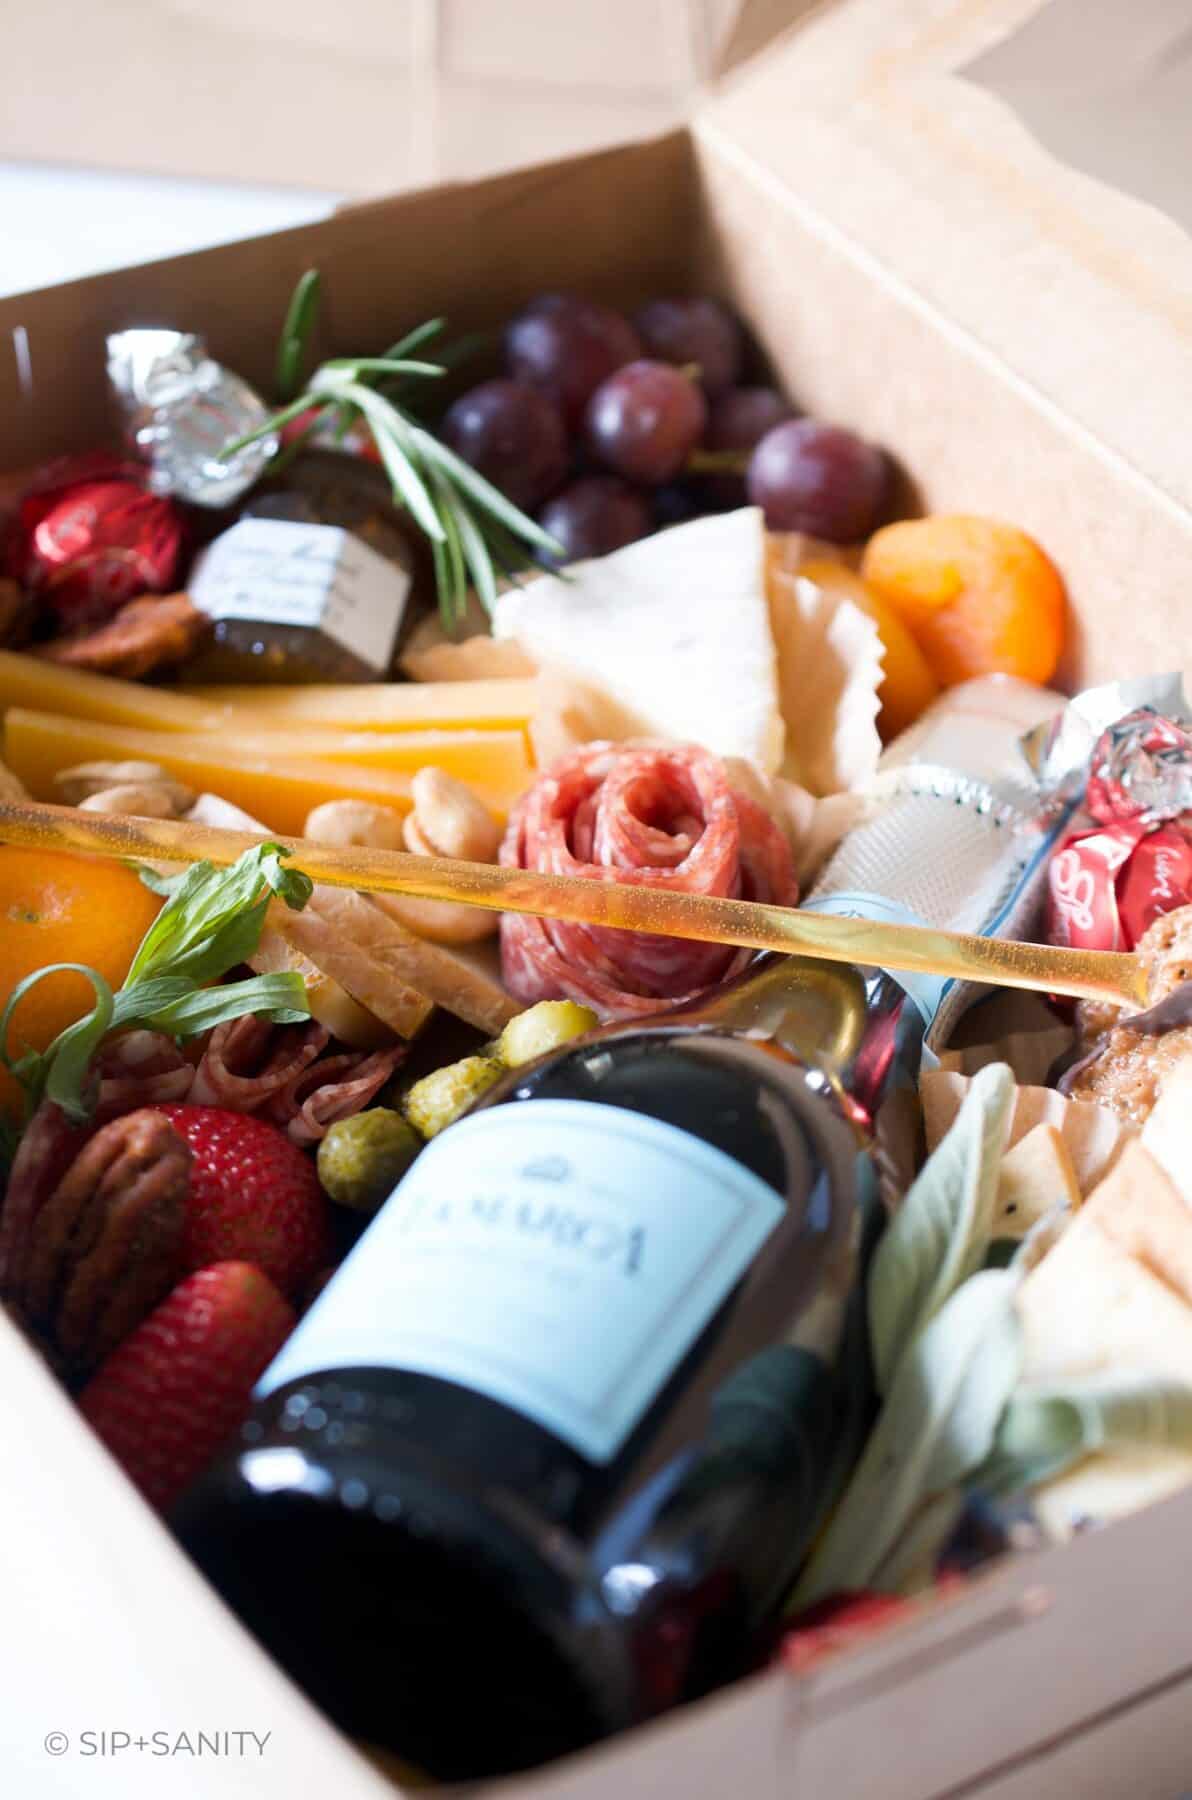
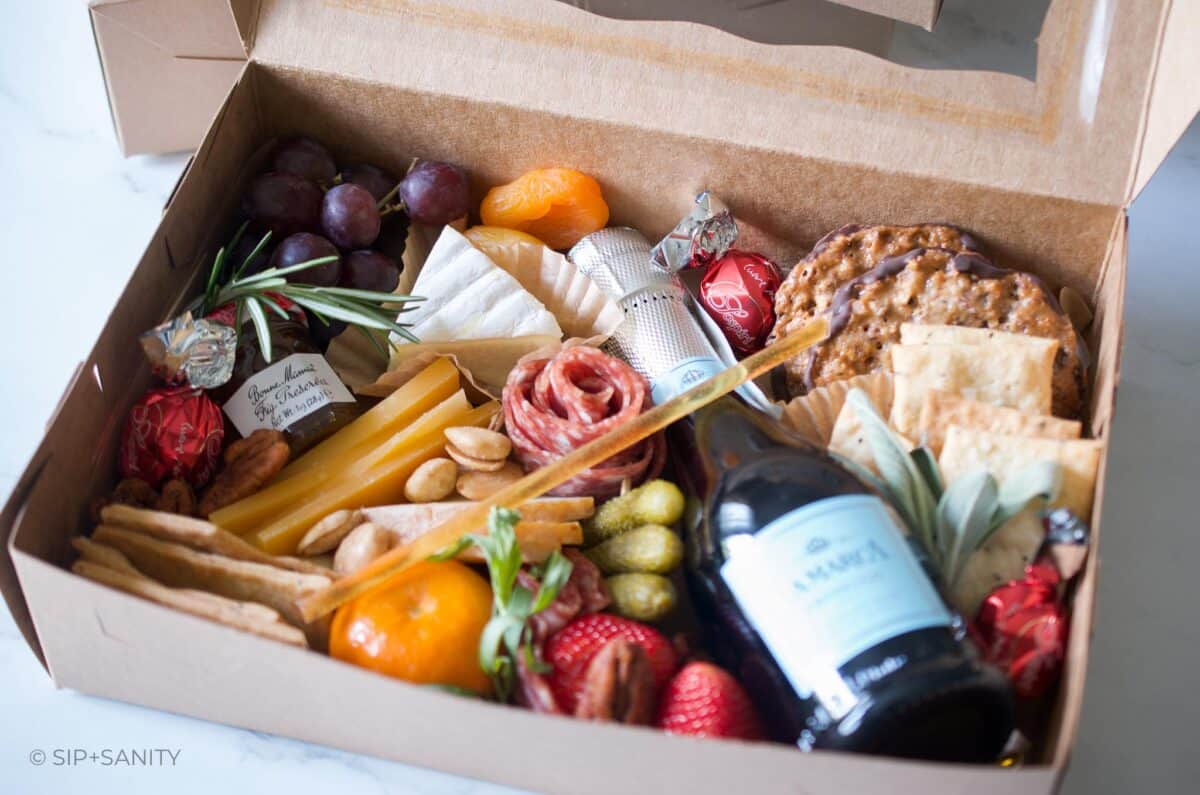
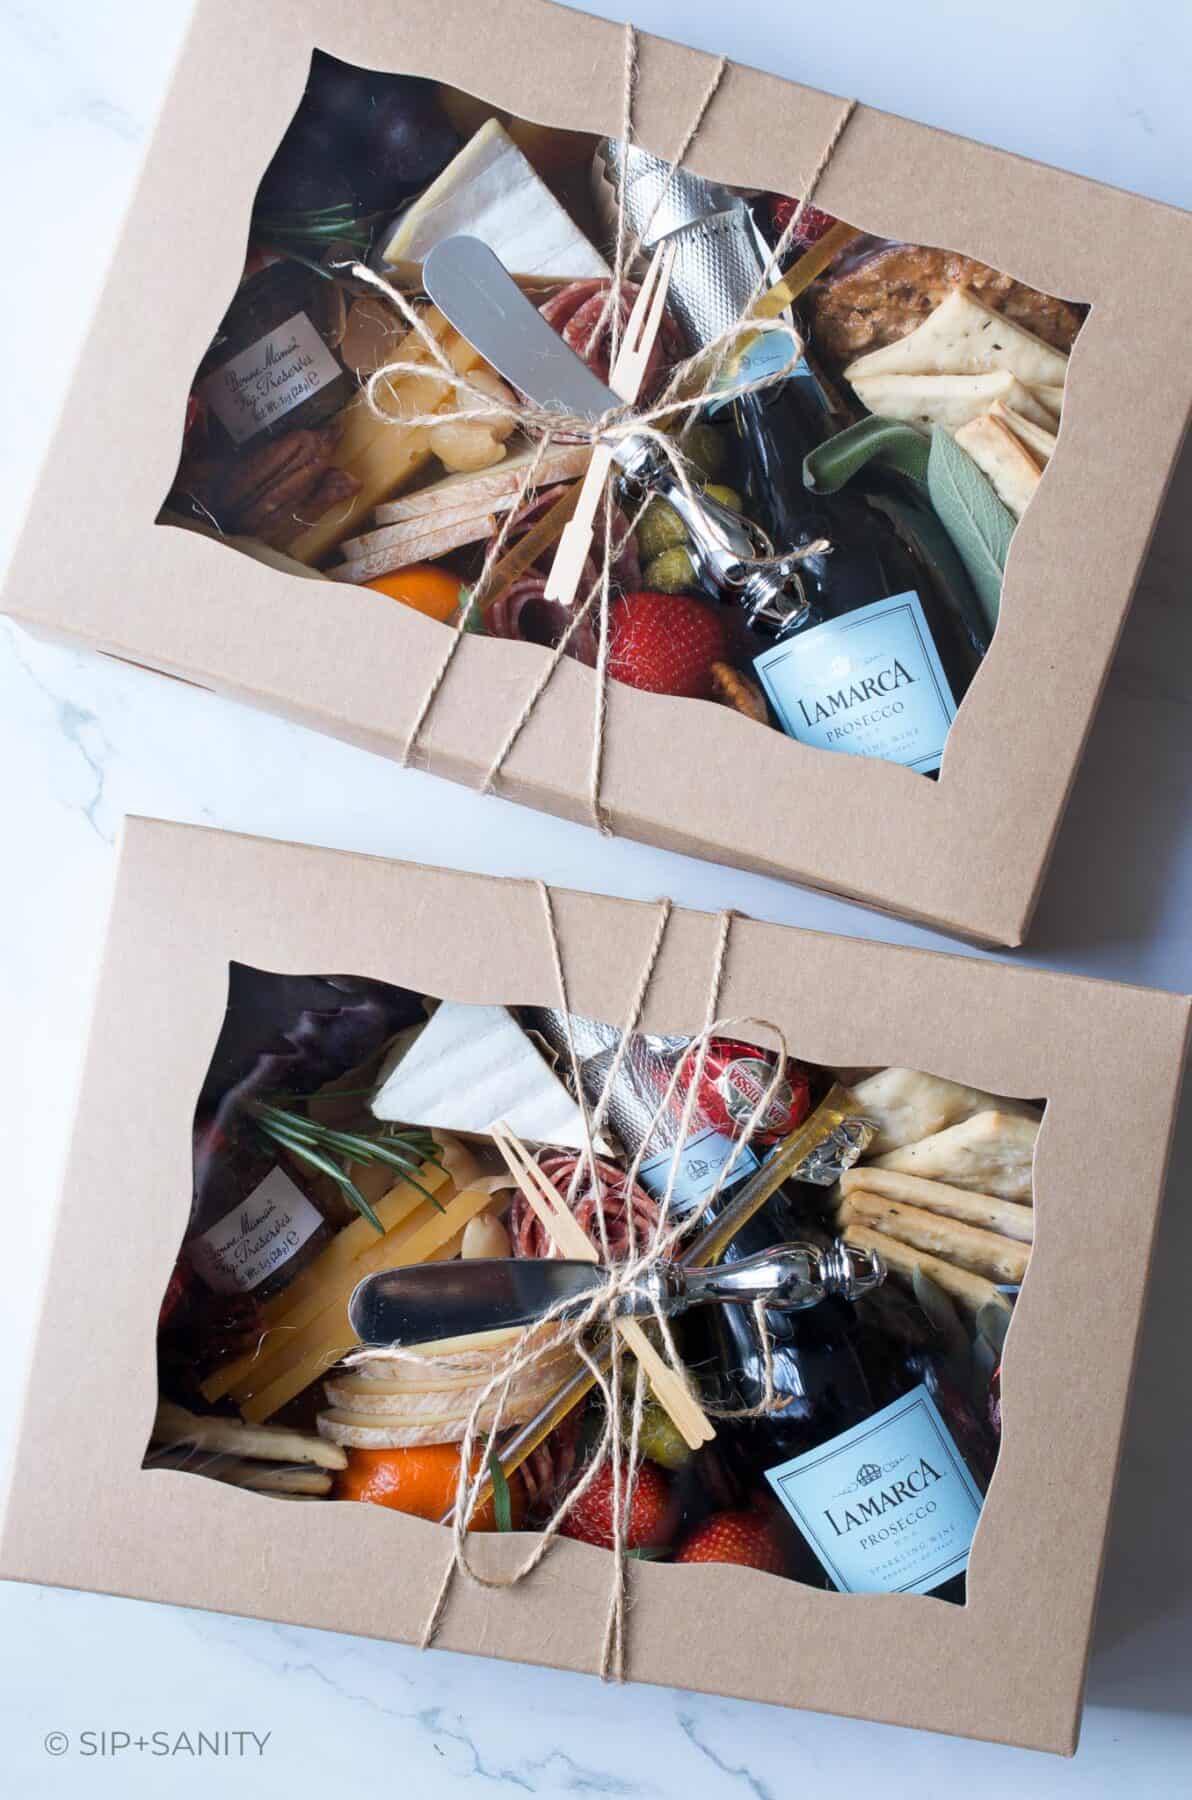
The box I’m building here is big so I could nestle a little bottle of prosecco inside. It measures 10-by-7 inches and is perfect when your grazing box IS the entire meal. The steps are the same for small boxes, but you’ll require fewer ingredients or components to fill it out.
- Start with larger items — place the largest items in the box first. This will include things like a salami rose or river, groupings of cheese, a clump of grapes, a stack of crackers, or small containers of jams or spreads. Think about creating balance (not the same as symmetry) in your box.
- Fill in the gaps — begin filling in empty spaces with small or bite size pieces of fruits, like berries or dried fruits. Add small treats like chocolate truffles. Sprinkle in nuts and seeds throughout. Add longer objects like a honey stick or breadstick crackers, as well as disposable utensils, on top.
- Add the garnishes — finish by tucking in fresh herbs or edible flowers anywhere to create balance, movement or contrast.
Storing the Box Until Serving Time
Once your individual charcuterie box is complete, store it in the refrigerator until it’s time to serve.
If you plan to assemble your boxes a day in advance, use a wad of aluminum foil or parchment paper as a placeholder for crunchy items like crackers or pretzels so they don’t get too soggy in the humidity of your fridge. Simply swap them in before you set them out to display or transport.
The Best Places to Buy Ingredients + Supplies
There are shops and options to fit every budget. Where I live, we have access to everything from specialty cheese shops and butchers to my favorite budget-friendly stores like Trader Joe’s, Lidl and Aldi.
If the stores near you are lacking in quality cheeses and charcuterie, you might find just what you need at your local farmer’s market. Our nearest weekend market has stalls selling fresh baked bread, local honey, cheese, and pickles, as well seasonal fruits and veggies.
For goodies like tiny jars of jam and honey, as well as nuts, crackers, cookies and the like, World Market never lets me down. You can also portion out honey and spreads into small jars and ramekins (reusable or disposable).
As for containers, you can find bakery boxes and other unique vessels at Michaels, on Amazon (especially if you need large quantities) and at larger department stores like Target. But, check your area for a baking supply shop like my local Fran’s Cake and Candy Supplies. They have so many types of boxes in different sizes and colors that you can purchase in any quantity (it’s where I got mine).
That’s a Wrap!
Creating DIY individual charcuterie boxes is a fun and creative way to impress and entertain guests and even give as a gift. Not only do they look great and make an impact, they are relatively easy to assemble. With the broad range of charcuterie meats, cheeses, fruits and nuts, and crackers to choose from, there is something for everyone…the possibilities are endless.
It’s time to get creative and start making your own charcuterie boxes. Experiment and find what combinations work the best for you, then don’t be afraid to share the love with family and friends.
More Ways to Entertain…
- Host a Taco Bar Party
- Holiday Party with Wine Cork Crafts
- Mother’s Day Garden Tea
- Valentine’s Day Indoor Picnic
- Normandy Inspired Dinner Party
- Halloween Grazing Board
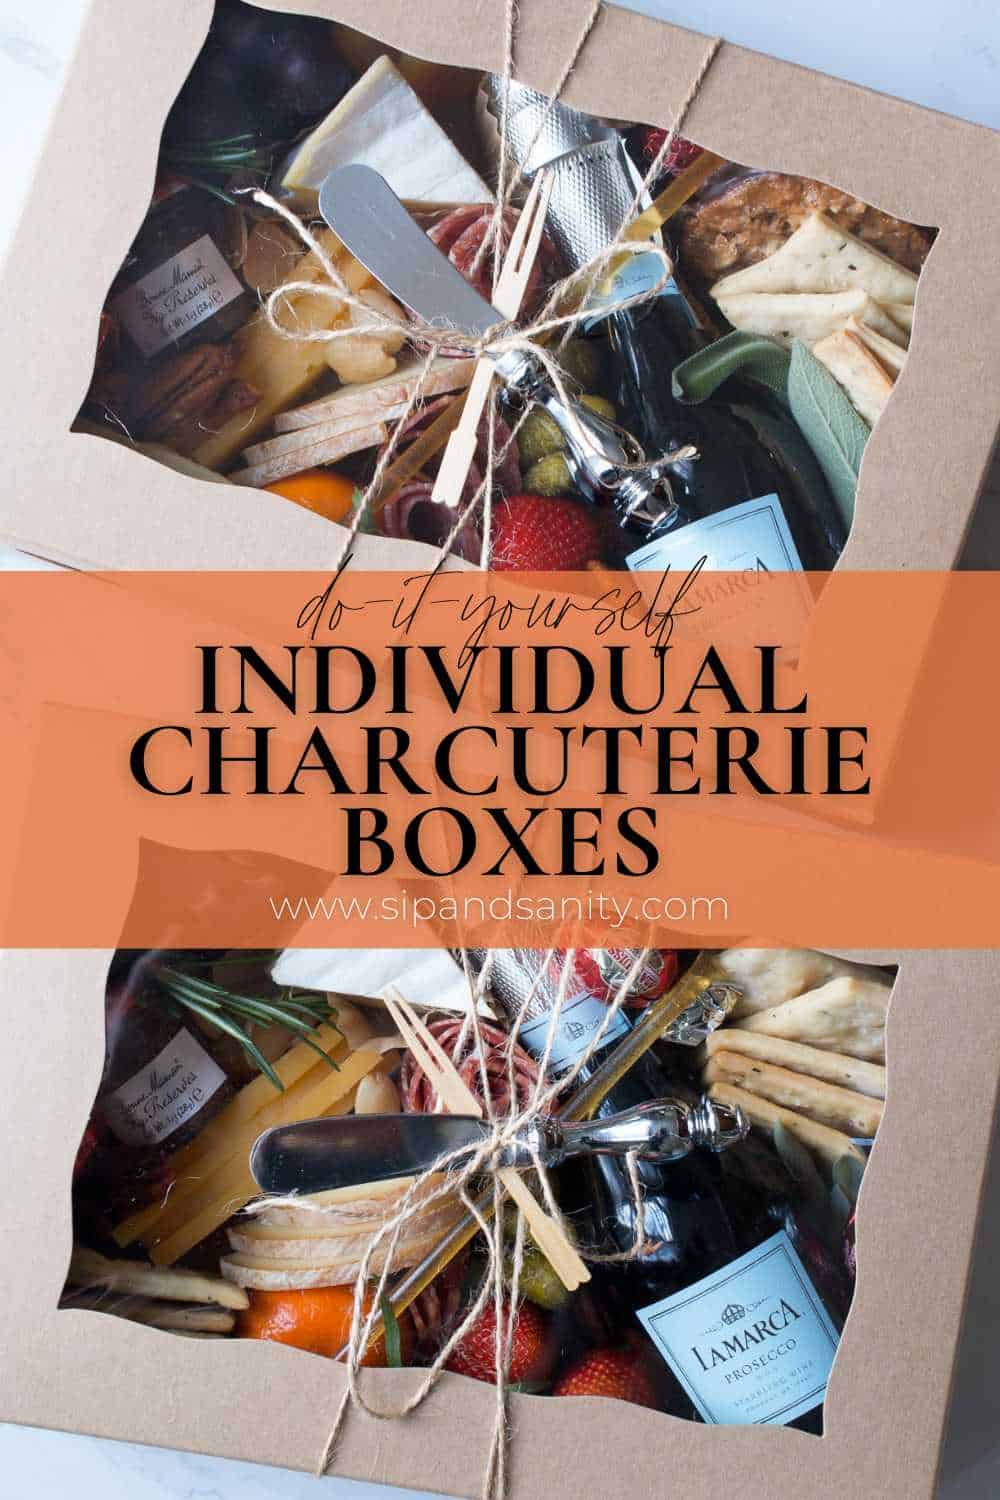
How to DIY Individual Charcuterie Boxes for Parties
Ingredients
- containers, boxes (with or without lids), cups, cones, mini cutting boards
- treat bags or plastic wrap, to cover and protect ingredients for transport or display
- twine or ribbon, to decorate or help seal your containers
- charcuterie, select one or more depending on the size of your container
- cheese, select one or more depending on the size of your container
- crackers or bread, crostini, water crackers, herb/seed/nut/fruit crackers, flatbreads, breadsticks, etc.
- fruits + veg, like grapes, berries, figs; carrots, cucumber, radishes, etc.
- dips + spreads, like mustard, jam, honey, hummus, tapenade, etc.
- nuts + seeds, any variety of roasted, herb seasoned, spicy, sweet
- olives + pickles, any variety of olives; cornichons, sliced pickles or pickled vegetables
- sweets, like dried fruits, trail mix, chocolates, cookies or mini baked goods
- savory snacks, like potato chips, pretzels, sesame sticks, etc.
- garnishes, like fresh herbs or edible flowers
- utensils, like forks/picks, knives/spreaders, jars/ramekins, muffin liners (to keep gooey cheeses from running or prevent items from touching)
Instructions
For cups + cones:
- Individual charcuterie cups or cones require you to think vertically. They are also smaller and ideal as an appetizer course. Wooden skewers can be used to help build your ingredients up and create a lovely presentation.
For boxes + mini boards:
- Start with larger items — place the largest items first. This will include things like a salami rose or river, groupings of cheese, a clump of grapes, a stack of crackers, or small containers of jams or spreads. Think about creating balance (not the same as symmetry).
- Fill in the gaps — begin filling in empty spaces with small or bite size pieces of fruits, like berries or dried fruits. Add small treats like chocolate truffles. Sprinkle in nuts and seeds throughout. Add longer objects like a honey stick or breadstick crackers, as well as disposable utensils, on top.
- Add the garnishes — finish by tucking in fresh herbs or edible flowers anywhere to create balance, movement or contrast.
Notes
- Store completed boxes in the refrigerator until it’s time to serve.
- If you plan to assemble a day in advance, use a wad of aluminum foil or parchment paper as a placeholder for crunchy items like crackers or pretzels so they don’t get too soggy in the humidity of your fridge. Simply swap them in before you set them out to display or transport.
Pin for Later! DIY Individual Charcuterie Boxes for Parties
Where did you get the straw with the wine
That’s a honey straw! I found a small box of them (8 to 10 maybe) at World Market near the tea things. I’ve seen them at gift shops and online, too. I love honey with blue cheeses!
Good evening what size is the box that is being use in the picture
Hi Danielle! The box is 10 x 7 x 2.75 inches. I got them from a local cake supply shop.
Hello, thanks for this tutorial 🤗 I just have a question: how do you secure/stabilize the bottle (Prosecco) to the box so that it doesn’t move around? Thanks!
Hi Bea! I first thought hot glue, but that would get brittle if you store it in the fridge. I’d stick a small ball or two of poster/craft putty on the backside of the bottle. Pretty sure you can find putty in the office supply aisle of Target, and of course, craft and hardware stores. Thanks for the question!