Our family room makeover solved for a traffic + space plan issue and outdated finishes. Now, it’s a cozy and comfortable destination to enjoy evenings as a family!

HOME RENOVATION SERIES
In 2016, we purchased a 1983 colonial-meets-Tudor house in Northern Virginia and set about remodeling it into our dream home. In this series, I’ll take you through the stages of our progress, decision-making, ups + downs, and the lessons we’ve learned converting a 1980s diamond in the rough into our family gem.
Every Problem Has a Solution
The family room was the last room on our main level to receive a little TLC. Aside from requiring some cosmetic updates, the design problems were largely space plan issues:
- A sliding glass door to the deck meant you had to go from the kitchen through the living space to get to the grill or outdoor dining.
- An outdated wet bar took up valuable wall space and made for awkward furniture placement.

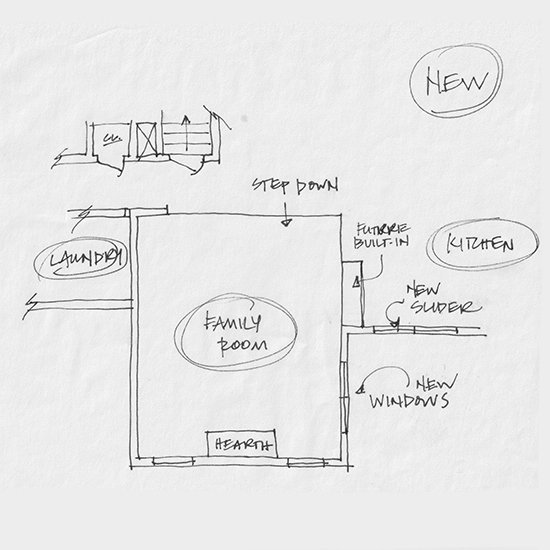
To solve for the traffic issue, we swapped the placement of the sliding glass door and windows in the adjacent kitchen area. The new location for the door makes it a lot easier to access the deck.
We removed the wet bar and reallocated that space to the laundry room. This provides a long uninterrupted space for a media center and book shelves.

While we use lamps most of the time for cozy lighting in this room, we installed some recessed lighting as well as a large center chandelier…for those times you need to brighten things up.
Cosmetic Updates
The Floors
Wall to wall carpeting was replaced with white oak hardwoods; the same used throughout the main level. I spent weeks looking for a large yet affordable area rug (because pets) to ground the furniture and add a little warmth. HomeSense to the rescue!

The Walls
We chose to keep the decorative molding on the long wall to help break it up, but simplified the profile. Rather than paint the wall field and molding different colors, the entire wall is painted in Sherwin Williams Extra White (our chosen molding color). It would have been too busy otherwise.
The rest of the room is painted with our main house color, Sherwin Williams Natural Choice (SW 7011).

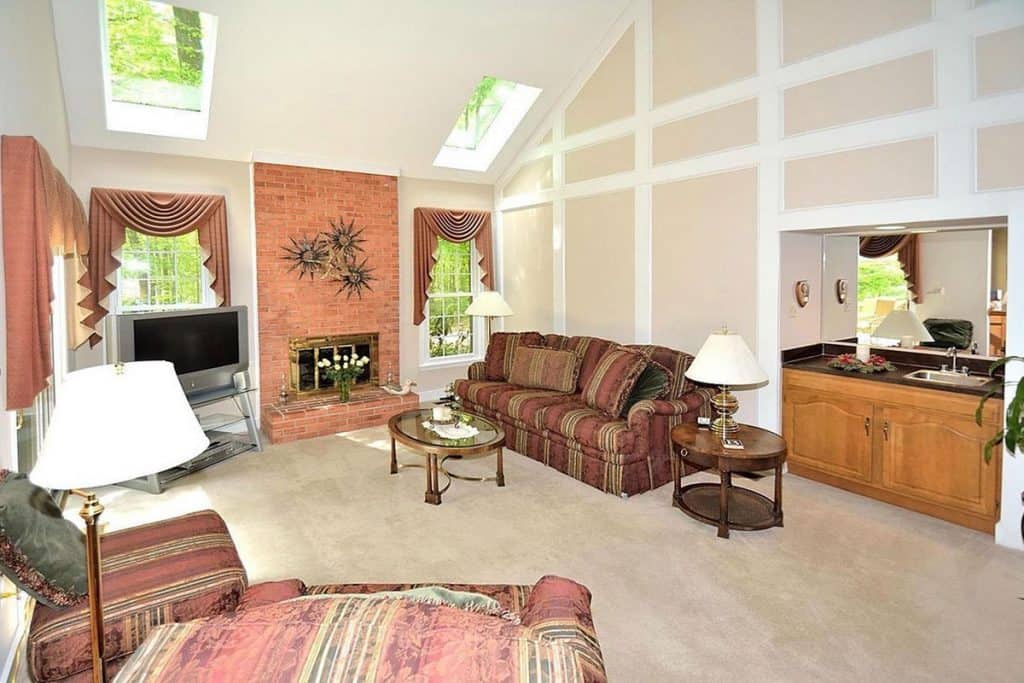
That Fireplace
Let’s just take a quick look at what it was before…

Simply designed and in good working order, but not our cup of tea. The solution:
- Clad it in a manufactured stone veneer (from Eldorado Stone)
- Pour a concrete hearth made to compliment the soapstone in our kitchen and slate tile in the adjacent hallway
- Add a reclaimed timber mantel to carry through natural wood accents
- Replace the fireplace doors with a simple matte black unit


One More Before and After!

Sources
- Paint from Sherwin Williams: Walls + ceiling, Natural Choice (SW 7011) / Trim, Extra White
- Fireplace stone
- Chandelier
- Hardwoods
- Bookcases
- Leather accent chair
- Coffee table
- Sectional sofa
With plenty of seating for the family + pets, we love gathering in our family room after dinner to enjoy a fire or catch our favorite show!
What will we tackle next?!
Pin for Later! Family Room Makeover
