Budget-Friendly Braised Christmas Beef Roast Recipe
Impress everyone around your holiday table with this budget-friendly Christmas beef roast recipe. It’s got big beefy flavor and a luxurious sauce to match!

The Perfect Winter Holiday Meal
The holiday season wouldn’t be complete without a tender beef roast as the centerpiece of our Christmas Eve meal. And, it’s totally possible to have a tender, juicy roast without breaking the bank.
Holiday dinner go-to’s like prime rib roast or beef tenderloin are delicious and decadent, but easily cost two to seven times more than my pick…the hard-working and economical chuck roast.
This beef cut is close to the shoulder (so it gets a lot of use), making it a tougher cut, but also contains a good amount of fat. Together, this produces really flavorful meat.
To get a fork tender roast, we’re braising it for several hours over moderate heat. The braising liquid is scented with herbs, clove, aromatics, tomato paste and porcini mushrooms – all working together to compliment that big beefy flavor! It’s the perfect main dish for special occasions.

Ingredients for a Holiday Beef Roast
In addition to kosher salt and fresh cracked black pepper, you’ll need…
- Bouquet garni – fresh rosemary, fresh thyme, bay leaf, whole cloves.
- Boneless chuck roast – a relatively inexpensive cut of beef, it’s commonly used in pot roast and stew. Because it has a fair amount of connective tissue, it’s a perfect cut for low and slow braising.
- Cooking fats – olive oil and unsalted butter.
- Aromatics – shallots and fresh garlic.
- Umami flavors – tomato paste and dried porcini mushrooms.
- Braising liquids – low sodium beef broth, red wine and Madeira (or Port).
- Corn starch – to help thicken the sauce.

Equipment and Supplies
I recommend a large, oven safe, heavy-bottomed vessel – I use a lidded 6-quart dutch oven for each cooking step of this recipe.
You’ll also need a square of cheesecloth and kitchen twine to make a bouquet garni, a small bundle or sachet of herbs and spices.
Steps to Braise a Beef Roast
- Make the bouquet garni – bundle the rosemary, thyme, bay leaf and cloves in a square of cheesecloth and tie it securely with kitchen twine.
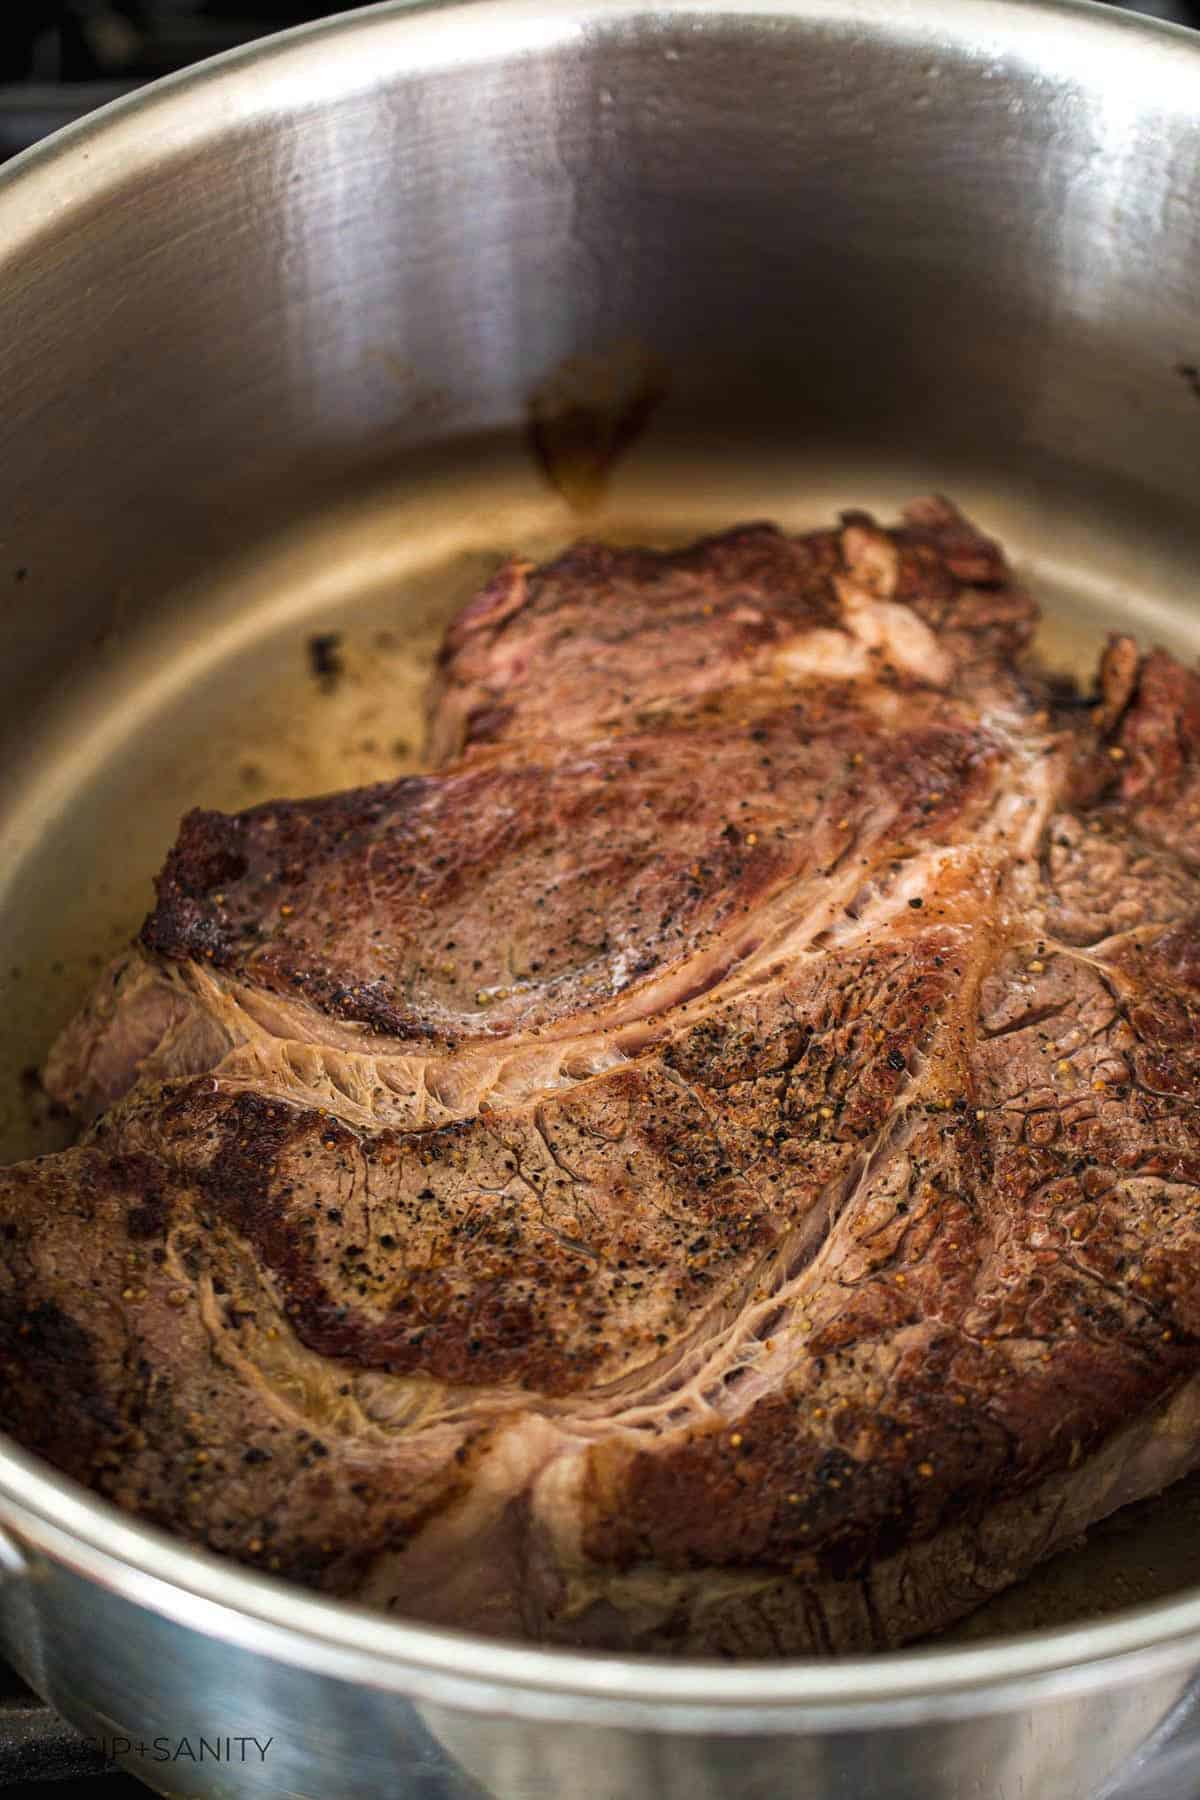
- Brown the roast – season the roast with salt and pepper then brown it on all sides in a large pot over medium-high heat. Transfer the meat to a bowl.
- Make the braising liquid – in the same pot, sauté shallots and garlic in butter until light golden brown. Add the tomato paste and cook for 1 minute. Stir in the red wine and scrape the bottom of the pot to loosen up any stuck bits. Add the broth, mushrooms and bouquet garni.
- Braise the roast – return the chuck roast to the pot. Bring the liquids to a boil. Cover and place it in a 350°F preheated oven to roast for 3 to 4 hours until it is fork tender.
- Finish the sauce – carefully remove the meat to a platter and tent with aluminum foil. Discard the bouquet garni. Boil the liquids for about 15 minutes. Whisk together the corn starch and Madeira in a small bowl, then whisk that into the pot. Cook for another 2 to 3 minutes. Taste and season as needed.


Helpful Recipe Tips
- Trim the roast – trim away any tough or large pockets of fat on the exterior of the roast. Leave any connective fat and tissue between sections of meat in place; those will render and break down as it braises.
- Skim the fat – you may see a layer of fatty liquid on top of the braising liquid. How much is there will depend on how fatty your roast is. Use a large metal spoon to skim that layer off the top.
- Level of braising liquid – it’s totally okay if the braising liquid does not cover the roast. That’s the nature of braising. If you’d like, you can turn the roast over halfway through cooking so every part of the roast has time in the braising liquid.
- Test for doneness – I’ve given a cooking range of 3 to 4 hours. This will depend on the individual piece and size of roast. Check the roast at 3 hours. Literally take a fork and try pulling away some of the meat. If it separates easily, it’s done. If not, continue cooking for up to one more hour. (I don’t even bother measuring the internal temperature.)
How to Display Your Main Course
- Arrange the whole roast in a high-sided serving dish and pour the finished sauce all around. Cut individual portions directly from the serving dish. (As pictured below.)
- Cut the roast into manageable pieces, then arrange them on a serving platter. Pour some sauce over the meat and transfer the rest to a gravy boat or bowl to serve on the side.
- Shred the beef and combine with some of the sauce in a serving bowl. Serve additional sauce on the side, if needed.
No matter how you choose to serve your Christmas chuck roast, don’t forget to garnish it with some fresh herbs for a bright pop of festive color.

Make-Ahead, Storing & Reheating Options
- Make ahead – you can braise the chuck roast up to 3 days in advance. Allow it to cool down some in the liquid before refrigerating. (The flavor will just get better!)
- Storing – once cooled, shred or portion the roast into smaller pieces. Transfer the meat and braising liquid to an airtight container and refrigerate up to 3 days. Use a container that allows most of the meat to be submerged in the liquid. Storing the roast and braising liquid together will help keep the meat moist and flavorful.
- Reheating – move the roast to your counter and allow to rest at room temperature for up to an hour. Transfer the meat and braising liquid to a large pot or skillet with a lid. Cover and simmer it over low to medium-low until heated through. Use low heat and allow it to reheat slowly to maintain tender beef.
The Best Side Dishes for Christmas Beef Roast
Don’t forget to eat your veggies! Green veggies like Brussels sprouts, green beans and broccoli all make fine accompaniments, but what this roast really screams for is hearty, wintry sides!
- Mashed potatoes
- Creamy polenta
- Parsnip puree
- Twice-baked potatoes
- Roasted carrots and other root vegetables
- Bread Stuffing
- Crusty bread, dinner rolls or even Yorkshire pudding!

What to Sip
You’ll need to open a bottle of red for the braising liquid, but you can enjoy the rest! You can find really tasty, budget-friendly bottles of Cabernet Sauvignon, Malbec, and Grenache…all would work well with this recipe.
More Beef Recipes!
- Slow Cooker Smoky BBQ Beef Tacos
- Leftover Corned Beef Hash Waffles and Eggs
- Cast Iron Skillet Meatballs
- Flank Steak + Chimichurri Flat Breads
- Steak + Stout Pie
- Steak Sliders with Gorgonzola

Braised Christmas Beef Roast Recipe
Ingredients
Bouquet Garni
- 9-in square cheesecloth
- kitchen twine
- 2 sprigs fresh rosemary
- 4 sprigs fresh thyme
- 1 bay leaf
- 3 whole cloves
For the Roast
- 3 to 3-1/4 pounds boneless chuck roast, trimmed of external fat
- 2 tablespoon olive oil
- 2 tablespoon unsalted butter
- 3 large shallots, peeled, trimmed and quartered
- 5 cloves garlic, peeled and smashed
- 1 tablespoon tomato paste
- 2 cups dry red wine
- 32 ounce low sodium beef broth
- ½ ounce dried porcini mushrooms
- 1 tablespoon corn starch
- 2 tablespoon Madeira, or Port
Instructions
- Preheat oven to 350 degrees.
- To make the bouquet garni, arrange rosemary, thyme, bay leaf and cloves in the center of the cheesecloth; break or fold the herbs to fit in the bundle. Gather up the edges of the cloth and tie it securely with kitchen twine.
- Sprinkle the roast with salt and pepper. Heat oil in heavy large pot over medium-high heat. Add meat to pot and brown on all sides. Transfer meat to bowl.
- Reduce heat to medium. Add butter to the pot to melt. Add shallots and garlic and sauté until golden. Add the tomato paste and cook for 1 minute. Stir in the red wine and scrape the bottom of the pot to loosen up any stuck bits. Add the broth, mushrooms and bouquet garni.
- Return meat to pot, pressing down to nestle it into the liquid (it does not need to be completely submerge). Turn the heat up to medium-high and bring liquids to boil. Cover and place in the oven to roast for 3 to 4 hours until it is fork tender.Note 1 (You can turn the roast over halfway through so all of the meat spends time submerged in the braising liquid.)
- Remove meat to a platter and tent with aluminum foil. Remove and discard the bouquet garni. Boil liquids in the pot about 15 minutes. Whisk the corn starch and Madeira together, then whisk it into the liquids. Cook for another 2 to 3 minutes. Season with salt and pepper.
Notes
- Test for doneness – I’ve given a cooking range of 3 to 4 hours. This will depend on the individual piece and size of roast. Check the roast at 3 hours. Literally take a fork and try pulling away some of the meat. If it separates easily, it’s done. If not, continue cooking for up to one more hour.
- Make ahead – you can braise the chuck roast up to 3 days in advance. Allow it to cool down some in the liquid before refrigerating. (The flavor will just get better!)
- Storing – once cooled, shred or portion the roast into smaller pieces. Transfer the meat and braising liquid to an airtight container and refrigerate up to 3 days. Use a container that allows most of the meat to be submerged in the liquid. Storing the roast and braising liquid together will help keep the meat moist and flavorful.
- Reheating – move the roast to your counter and allow to rest at room temperature for up to an hour. Transfer the meat and braising liquid to a large pot or skillet with a lid. Cover and simmer it over low to medium-low until heated through. Use low heat and allow it to reheat slowly to maintain tender beef.
Nutrition
Pin for Later! Braised Christmas Beef Roast


I am going to show this to my husband as he has beef for Christmas as I know he will absolutely love this! It sounds so delicious, and not too difficult to make. Thanks for this amazing recipe!